Pipehacker Project: The Black Art of Black Wax
 Back in the day, the gooey black bits of “cobbler’s wax” were oftentimes a melted mess in a piper’s maintenance kit awaiting their next turn at a strand of hemp. What is simply globs of pine resin and pitch (otherwise known by the scientific name “soot”), the stuff was crumbly, sticky, and infuriating at the same time but has always been ideal for sticking that first wrap of hemp on your pipe tenons. But what do you do when your chunk of black wax has crumbled to nothing? Sure you could buy more at your favorite online bagpipe supply house for a few bucks but that requires shipping and waiting. Certainly, that’s not what the enterprising pipehacker would do! Why, you’d make your own that is easier to handle, using stuff around the house that will keep you and perhaps your whole band waxing up their hemp with the black stuff forever!
What You’ll Need
- Violin Bow rosin (at least 2, the easiest source of pine resin)
- Pure beeswax
- Piece of artist’s charcoal or black pastel chalk
- Olive oil
- Measuring spoons
- Kitchen tongs
- Vegetable peeler
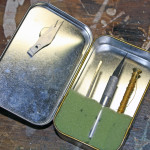
- Candy tin
- Cloth or handkerchief
- Hammer
- Empty soup can
- Bowl of ice water
- Saucepan
- Pencil or popsicle stick
How to Do It

1. PREPARE YOUR MATERIALS. Set an inch’s worth of water in the pot and set to boil. Remove the bow rosin from its wood “holder” and break into small pieces. Wrap the rosin in the cloth or handkerchief and give a few soft strikes with the hammer. Break up the beeswax using the vegetable peeler and create a pile of wax shavings and crumble them into small pieces. Grind the charcoal into a fine powder with the back of a spoon and set aside. Use standard measuring spoons and measure out 2 tablespoons of rosin pieces (1 normal block of rosin will yield about 2 tablespoons). Create a pile of beeswax pieces that is about 1/2 as large. Prepare a 1/4 teaspoon of olive oil, and 1/2 teaspoon charcoal powder. Prepare the bowl of ice water. Keep some extra rosin pieces and beeswax shavings aside for adjustments as you prepare.
2. MIX YOUR INGREDIENTS. Place the measured out beeswax and rosin into the can. When water is at a boil, use the tongs to hold the can in the boiling water. Hold until the beeswax and rosin start to melt. Watch closely. It will not take long for the whole mix to liquify. Be careful not to overheat. Add the charcoal powder and olive oil. Stir with the pencil or stick.
3. TEST TACKINESS. Lift the stick out of the mixture and let a bit of the mix drip into the ice water. Take the cooled/hardened piece of wax and test with your fingers. It should be sticky but not too soft. If it is to soft and sticky, add a bit more bow rosin to the mix, if not sticky enough, add a bit more beeswax and reheat as in step 2. Retest.
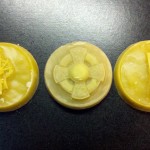
 4. CREATE ROSIN CAKE. Wipe a bit of olive oil to the cup of the candy tin. When the liquified mix is ready, carefully use the tongs and pour the mixture into one of the cups of the candy tin. You should have enough to fill 1 cup of the tin. Let the mix cool completely. When cool, test the softness and tackiness again, you can always re-liquify the cake and add more beeswax or rosin as needed.
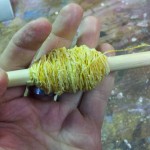
 5. READY FOR HEMP. When the cake has cooled, it is now ready to use on the base wraps of your next hemp session. Use the remaining material and make more cakes that will fill all your hemping and maintenance needs into the next century.
 Pipehacker


