Pipehacker
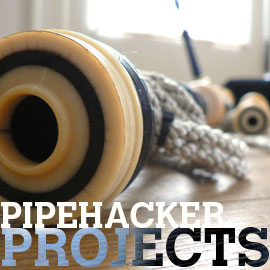
Pipehacker Project: The Black Strap Water Trap
 Moisture to the bagpiper is like DDT to the mosquito. A build up of too much moisture in your instrument means certain death of your reeds and nothing but trouble when trying to achieve a stable sound. The preponderance of products for pipers to address moisture problems alone is a testament to the importance of controlling it. In all of this, the humble water trap has become a ubiquitous part of the active piper’s gear—be they hide purists or synthetic advocates. The Scots, being clever enough to develop so many fine things in life (like bagpipes), perfected the craft of developing a simple, home-grown method to catch excess spit and condensation in the bag at a very early stage. John MacLellan MBE outlined a simple water trap in his 1964 book The Pipers’ Handbook consisting of 1/2-inch copper tube poked through a cork stuck into the bottom of the blowstick stock—basically a reservoir for collecting spit.
Today, there are many commercial solutions, many quite clever and complicated—and loaded with failure points—but none any more effective than the straightforward (and inexpensive), homemade, pipe-hacked tube version here. (Note: This particular version will insert into the bottom of your blowstick stock so access to the inside of your bag and/or the bottom of your stock is required.)

What You’ll Need
- Black vinyl tubing (1″ O.D. x 3/4″ I.D.)
- 1/2-inch threaded PVC plug
- 3/4-inch PVC connector elbow
- 1/2-inch vinyl O-ring
- Metal file (or Dremmel tool with emery wheel)
- Sharpie marker
- 5/32 to 3/16-inch drill bit
- Power drill
How to Do It
 1. PREPARE YOUR TRAP. Cut a 19-1/2 inch length of the vinyl tubing. The natural curve of the length of tubing should follow the curve of the pipe bag’s seam and just reach the back measuring from the blowstick stock. A 19-inch length is a good general measurement for a typical pipe bag. Measure your own bag to make sure the length of tubing will be long enough to get up into the bag but not be too long.
 2. CREATE AIR PASSAGE. Measure 3/4 of an inch from one end of the tubing on the inside of the tube’s curve. Mark out spots in three rows of staggered dots about 1/4-inch apart down 3 to 4 inches of the tubing. Carefully (and slowly) drill through the surface of the tubing at each dot. When finished, there should be staggered rows of holes that extend at least 3 to 4 inches.
 3. PLUG THE TRAP AND TEST. Insert the threaded plug into the end with the drilled holes. Give it a blow from the other end to test airflow. Drill a few more holes in each staggered row if you feel there is any resistance as you blow through.

 4. PREPARE YOUR CONNECTOR. Take the metal file and file down the angled ridges or “steps” all around one arm of the PVC elbow until the circumference is relatively smooth. Try this end in the base of your blowstick stock for fit as you go. Stop filing when the smoothed elbow inserts easily. You may luck out and find that very little filing is needed or you may be at it for a while. All will depend on the make of your particular drones. A Dremmel tool with an emery wheel is a good option for the job. Access to a good belt sander would be a great asset here.

 5. FIT YOUR CONNECTOR. File a “slot” for the O-ring with the angled edge of the metal file. File around the circumference of the smoothed “steps” in a spot near the tip. The remnants of the ridges should provide a guide for keeping the file stable. Here’s where it gets a bit tricky and where good old fashioned trial and error comes into play. When you feel the slots are deep enough, slip the O-ring into place and insert the elbow into the base of the blowstick stock. File a deeper slot for the O-ring if you cannot insert it smoothly. Keep alternating between filing and fitting until the elbow pushes in with O-ring easily. Take it slow. Don’t file the slot too deep. A good Dremmel tool with a grinding wheel is also a good tool for this task but, the metal file does the job well, provides the right angle, and offers a bit more control.
 6. ASSEMBLE YOUR TRAP. Take the other, untouched end of the elbow and push it into the open end of the vinyl tubing. Keep in mind how the tube will extend inside your bag from the base of the stock. The tubing will naturally curve. Make sure you insert your elbow so that the back of the curve will point upwards in the back of your bag.
7. MOISTURE FREE! Your black strap water trap is ready for action. Make adjustments to position to make sure the tube is not poking into the sides of the bag as you play. Zippered bags make for easy access to continued adjustment and cleaning. Empty the trap during playing sessions with a tip of the bag to empty through the blowstick stock.


-
Michael Neal McGee
-
mike
-
pipervin
Buy the Whisky Tunes Collection!

WHISKY TUNES ONLINE TUNEBOOK!
SMALL TUNES ONLINE TUNEBOOK