Pipehacker Project: Waxing Hemp-ish
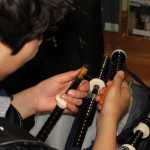
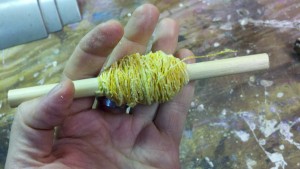 Having well hemped joints on your bagpipe is a critical part of a well set-up and efficient instrument. The hemp used should use a good amount of black wax as a base with plenty of wraps of waxed hemp to finish it off. The wax regulates moisture absorption as well as keeps the hemp adhered to itself to prevent fraying and loosening. The only wax that does the job right is natural bees wax. Many a piper has developed bulgy forearms pulling strands of hemp through cakes of bees wax as they ready their supply to wrap on their pipe. And a lot of it, too. It is no surprise that pre-waxed rolls of hemp are readily gobbled up by pipers everywhere.
Pre-waxed hemp for your bagpipe joints is a very modern convenience. Who doesn’t have a roll of the stuff in their pipe case? Trouble is, the wax on that stuff is not tried and true beeswax—the stuff that has been used by bagpipers since there were, well, bees and bagpipers. The pre-waxed hemp you can buy today is coated in paraffin wax, which is made from hydrocarbons and is essentially brittle at room temperature. It does in fact dry out quickly and flake away, thus making the hemp stop performing its natural cycle of swelling and shrinking and hastening the need for a complete replacement. Some pipe makers will tell you too, that the paraffin wax used on pre-waxed hemp will put extra wear on the inner bores of your drones (it being composed of chemical additives in addition to the same hydrocarbons that make up kerosene) while natural bees wax does not possess the same abrasive qualities.
Either way you wrap it, it is in your best interests as a bagpiper to be doing what pipers have always done—coating your hemp with 100% natural bees wax. Here is a project that will have you making your own pre-waxed hemp with the right stuff. You will coat a higher volume of hemp easier and quicker than pulling single threads through your wax patty any day, and create a roll of waxed hemp that is superior to anything you can buy.
What You Need
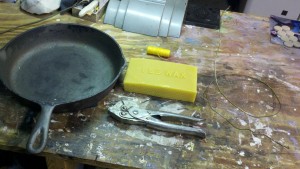
- Cake or bar of about 8 oz. of natural bees wax
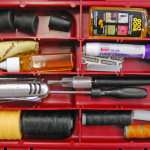
- Roll of unwaxed hemp, or even a roll of the prewaxed stuff will do
- Wire coat hanger
- Pliers
- Old pan or pot you don’t mind using.
- Hot plate or stove
- Wooden doweling
How to Do It
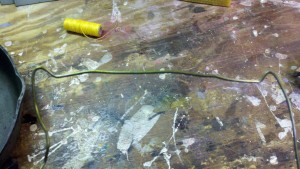

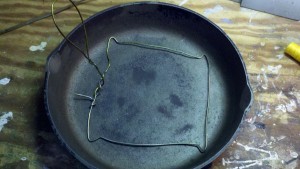 1. Prepare your wire frame. You will be stringing a frame made from the coat hanger with hemp much like a harp. Use your pliers to bend and shape the coat hanger into a rough circle or rectangle. It should sit flat against the bottom. One coat hanger is enough to make a frame for a normal 10-inch pan without any cutting. Bending small upward bends at each corner will help the hemp stay in place. Use the excess wire to create a “handle” by bending and wrapping a loop.
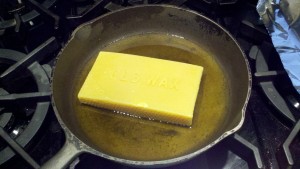 2. Melt your wax. Natural bees wax is dirt cheap and easily acquired in any amount from many vendors on Ebay. (Shop around as prices per pound can vary.) Place your pan on the heat of your stove or hot plate. Toss in your chunk of bees wax. You can shave or grate the wax for speedier melting. Melt enough to go up about 1/4-inch in the pan, 8 oz. should do the trick.
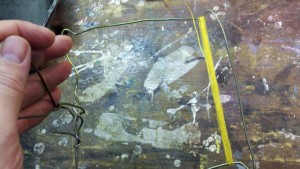
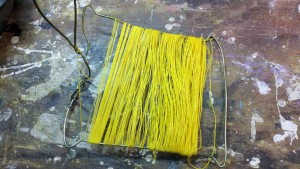 3. String your hemp “harp.” While you wax is heating and melting, tie one end of your hemp to the corner of your wire frame. Begin wrapping around the frame. Keep each wrap as tight as you can. Make sure the hemp does not overlap. Tie off the final wrap. The “harp” pictured shows the hemp fairly loose. The tightness doesn’t necessarily matter, but having it tight will put the hemp flatter against the bottom of your pan ensuring good coverage.

 4. Wax on! When the wax is fully melted, turn off the heat. The wax will stay liquified for some time. Dip your strung hemp harp into the pan to fully submerge all strands. Move it around a bit to ensure good coverage. The hemp will absorb the melted wax instantly. Remove the frame and let drip back into the pan. Set aside and let it cool on some tin foil or an old cloth.
5. Repeat. Unwrap the newly waxed hemp once it cools and wrap it back on short piece of wooden doweling, pencil, or whatever you have laying around. Reheat your wax and repeat with more hemp until you feel you have enough.
 6. Waxed and ready. You now have enough of your own pre-waxed hemp fully coated in 100% natural beeswax, ready for your regular maintenance ritual. Ancient pipers the world over are smiling in their graves.
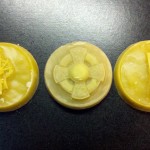
Note: You will realize that you are left with a substantial amount of melted wax remaining after all this. The hemp does not need much to coat. When you are finished, coat the inside of a small bowl with cooking oil or Pam spray. Pour in the melted wax and let cool. You will then have a chunk ready for the next time it is needed.
-
okiwen2
-
Anonymous
 Pipehacker