Pipehacker
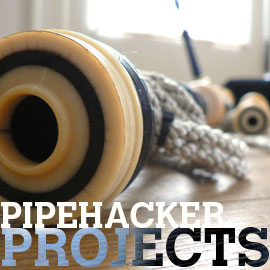
Top Pipehacker Project in 2013: The Piper’s Perfect Pressure Gauge
The bagpiping world seems to be divided up into two groups: 1) The denizens of bagpipe internet forums who are sure manometers, i.e., tubes filled with water, will make them better pipers and talk as if manometers and pressure gauges are as commonplace in your piping gear as hemp and black tape; and 2) everyone else.
Advocates of using a manometer have all sorts of DIY methods of construction with tubes, dyes, and whatnot. The purpose of these homebrewed thingamajigs (or any of the recent commercially available dial pressure gauges out there) is to see how much water your blowing pressure can move…or something. But if what you’re trying to do is improve your bagpipe playing, the numbers or “inches of water” are meaningless when trying to achieve an air efficient instrument, a comfortable, stable set up, or improve the quality of your sound.
That’s not to say that such tools have no value. The gauge’s true calling is as a diagnostic tool: measuring the air efficiency of your instrument. Because it is only at that point when you can even begin to work toward steady blowing on the bagpipe. It is here that some visual reference is helpful. Many a piper has obsessively believed their bag has a leaky spot, or a weak point on the instrument where air may be escaping. Others frantically search when the true causes are physical issues, not instrument issues, and these physical issues also need to be diagnosed. For this, a handy, inexpensive pipehacked gauge to determine whether your instrument is working in top form is needed. Assembly couldn’t be easier and use is better than any other solution your can dream up. And if a number is really needed, heck, you can just blow right into the thing.
What You Need
- Auscultatory method aneroid sphygmomanometer (standard blood pressure cuff)
- Standard rubber medical tubing (optional)
- 1/4-inch brass hose connector
- No. 3 rubber stopper with pre-formed hole

How to Do It
1. Prepare your materials. Inexpensive home blood pressure cuffs are easily found out and about these days. Make sure you find one that uses the auscultatory method, which has an old style analog gauge and a stethoscope. The gauge should not have digital sensors of any kind. (The vintage beauty that gave up the gauge shown here was found on Ebay for $3 and free shipping!) Snip the sphygmomanometer gauge off of the cuff and keep as much tubing as you can. If the cuff you have does not have any tubing, disconnect it and attach your length of separate medical tubing to the gauge’s nozzle.

 2. Assemble your gauge. Push one end of the brass hose connector through the hole in the rubber stopper as far as it will go. The medical tubing of the blood pressure cuff should fit snugly over the other end.
 3. The piper’s perfect gauge! Now try out your gauge by placing the stopper in your chanter stock. Inflate your bag and play your drones. Keep an eye on the gauge’s needle and pay attention to how often you blow to keep it steady. Too much effort at this should tell you your instrument’s air efficiency is compromised somewhere. For the curiosity seeker: If you want to have a go at measuring your blowing pressure when playing, pull out one of your tenor drones from its stock and pop in the stopper of your new gauge and play normally. Watch the gauge needle for variability (oh, there will be some…). The conversions from millimeters of mercury (mmHg)measured on the sphygmomanometer to pounds per square inch (psi) and inches of water (iw) are as follows:
psi = .019 x mmHg
psi = mmHg/51.72
iw = mmHg/1.868
iw = mmHg x .54
A small 1/8-inch brass hose connector and some extra medical tubing can give you additional length in order to position the gauge at a better viewing point.


Buy the Whisky Tunes Collection!

WHISKY TUNES ONLINE TUNEBOOK!
SMALL TUNES ONLINE TUNEBOOK