Pipehacker Project: The DIY Blowstick Valve
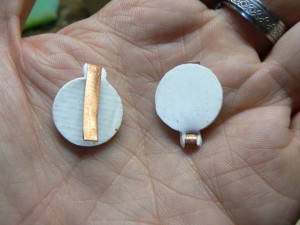 Are there any pipers left who remember the days of leather blowstick flapper valves? The little circles of old bag leather that dried up and had to be gnawed back to life in order to function? No? Well, once upon a time pipers had to make their own flapper valves to tie on to their blowpipes. It was an easy thing—cut a circle of leather with a tail and you’re done. The problem is that they wore out quickly—and usually with prejudice—and had to be replaced on a regular basis. Today we have rubber, plastic, and little vinyl flaps on strips of metal or plastic. But why rely on others for what you can make yourself? Harken back to the days when pipers made their own valves and follow the steps below to make your own. Buy a piper a valve and he plays for a day, teach a piper to make his own and he plays for a lifetime…or something.
What You’ll Need
- 12 x 12 flooring tile or similar hard, flat surface
- 4 x 4 square of thick board at least 1/16-inch thickness
- Small tube of silicone tub caulk
- Short strip of copper banding or sheeting
- Duct tape
- Putty knife
- Xacto knife
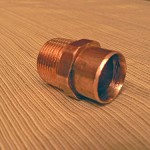
- Copper or aluminum tubing (5/8-inch I.D.)
- Metal file
- Deburring tool
- Hammer
- Metal shears
- Parallel jaw pliers
How to Do It
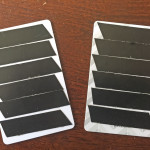
 1. PREPARE YOUR MATERIALS. Lay a length of duct tape on the floor tile. Measure the width of the duct tape and use the Xacto knife to cut an opening in you 4 x 4 piece of board. Perfection is not important here, you just want a big enough opening so that the duct tape covers the entire opening. Other material can work here as well, as long as it is at least 1/16-inch thick. Pre-cut matte boards from small picture frames are also suitable (and no cutting required!). Cut a 1/8-inch opening in your tube of caulk.
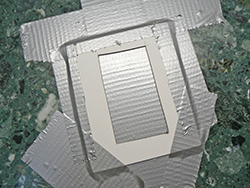 Tape your cut frame to cover the length of duct tape on the floor tile and tape down the edges. Make sure the frame is sitting as flat as possible. You are essentially creating what will become a tray or “mold” to contain the silicone.
2. FILL YOUR MOLD. Squeeze in plenty of silicone caulk into the opening of your frame. Fill as completely as you can. Use the putty knife to smooth and flatten the caulk in the frame. Try to spread the caulk as evenly and as smoothly as you can. Use a rag to clean up any excess and let dry overnight. The frame guarantees that the caulk will achieve a uniform thickness.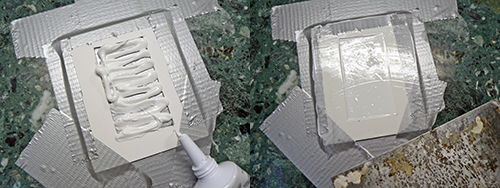
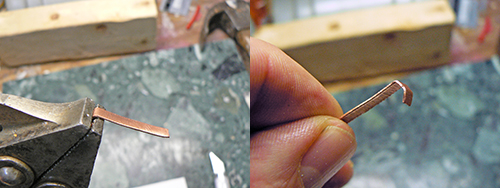
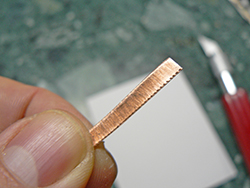 3. MAKE YOUR STEM. Cut a 1/8-inch wide strip from the sheet of copper. Trim to 1-inch in length. This will be the stem of your flapper. Grab about 1/8-inches of the copper stem with the pliers. Bend a right angle. Remove the stem and grab about 1/16-inches from the tip and make another small bend. You should wind up with a small hook-like end.
4. PREPARE YOUR PUNCH. Your punch will need to be “sharpened.†Take your piece of tubing and file the outside edge on an angle around the circumference. Use the deburring tool to scrape away material on the inside diameter. Keep scraping around the inside until you hone a decent edge. Take your piece of tubing and use the the flat edge of your metal file to create a small notch that is about 1/8-inch wide. The more well-equipped piper can use their Dremel tool to grind away a recess just as easily. The 5/8 I.D. just happens to be a general dimension of one blowpipe. You may need to find tubing with a different I.D. depending on the diameter of your own make of blowpipe. It’s important that the valve not extend beyond the edge of your blowpipe tenon or the flap may require cutting and adjusting.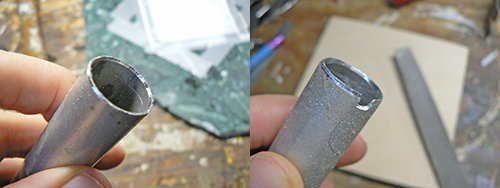
5. RELEASE YOUR MOLD AND STAMP OUT YOUR FLAPPER. When the silicone is dry, lift the “sheet” of dried caulk from the duct tape. (Now you see why you used duct tape as a base. The silicone lifts and does not adhere.) Lay the silicone on a clean surface such as a piece of wood or cloth. This sheet is your supply of flapper valve material.
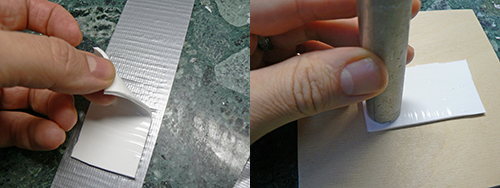 Use the tube punch you prepared earlier and place about 1/2-inch from the edge of our silicone sheet with the “groove” facing toward you. Use the hammer and gently tap to cut through the silicone. The groove you filed into the copper leaves the silicone blank attached so you can cut a tail for your valve. Cut the tail of your flapper straight from the disc to the edge and trim to about 1/16 to 1/8-inch long.
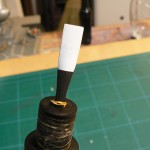
 7. ASSEMBLE YOUR FLAPPER. Line up the end of the tail of your flapper to the beginning of the bend of your stem. Hold the silicone in place and crimp the hook end gently to pinch the flapper tail. Be careful not to go too far or the copper will pierce the silicone.
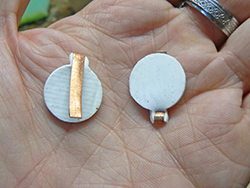
8. COMPLETE! Your new flapper is ready to be tied onto your blowpipe!
Alternate Methods
A similar length of plastic can work as a stem as well. You will need a strip of an old credit card or other thick polystyrene. Leave about 1/4-inch of a tail on your flapper and secure to the plastic stem with a length of 1/4-inch shrink tubing.
Use clear packaging/postal tape as a base instead of duct tape. The duct tape is a bit dimpled and does not give you a truly flat and smooth surface. Expect the clear packaging tape to be just as resistant to the silicone and give a smoother result.
 Pipehacker






Pingback: Pipehacker Tip: Bagpipe Bag Hole Punch :()